The following steps explain creating a Scene7 Template using layered PSD file for adding text overlays on images. Image Server (IPS) can deliver these images using presets with text and image passed as parameters in URL.
More about templates in documentation

Create PS Document
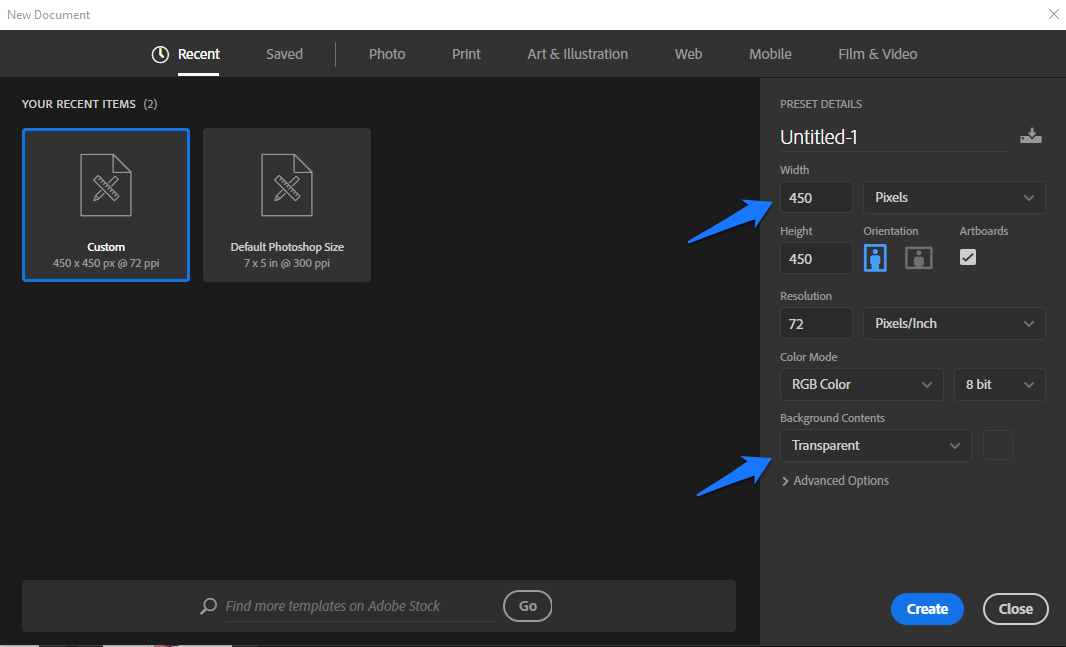
1) Open Photoshop, Click File > New, enter Width & Height of image (e.g. 450 x 450), select Transparent background, click Create...
2) Add a template image on the transparent background. You can open the image ( File > Open ) adjust size to 450 X 450 and copy it to the psd layer created in step 1...

3) Add a Rectangle on the Image (about 20% from the top), fill with gray background and set the opacity to say 75%. This section on the image is for text overlay...

4) Rename the layers so the generated assets from PSD layers in Scene7 have some meaningful asset names. Download the sample psd here

Create Scene7 Template
5) Login to Scene7 SPS - https://s7sps1.scene7.com/IpsWeb/, select the folder in left pane and click Upload...

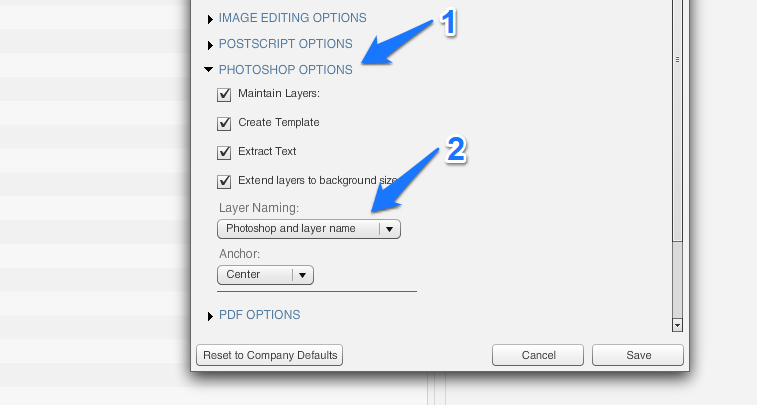
6) Select the PSD created above by clinking Browse; In the bottom right corner of upload window, click Job Options to configure the layer extract (and generate assets) specific settings...

7) When the PSD upload job processing is complete in Scene7, you should see the generated assets from extracted layers... (if you donot see generated content, click Setup > General Settings > Show Generated Content)


8) Click Edit on the Template card (this template was created from PS doc uploaded). Edit it to add heading & subtext overlays and parameterize the template....

9) Drag the Text tool onto image, using the RTF editor add some text e.g. HEADING, format it with font, size etc.

10) Similarly add the subtext...

11) Before parameterizing the template, check if Preview looks ok (image with heading and subtext overlay)

Create Scene7 Template Parameters
12) Lets parameterize the image, heading and subtext of the template for creating dynamic images with text overlays (pass the image name, heading and subtext as parameters to image url). For adding Image parameter, click on P button

13) For parameterizing the heading text, click on the P button next to it, click on the Text tab in resulting window, select the text and click add to configure the url parameter

14) Similarly parameterize the subtext

15) Click Preview, to experiment with the parameters, change text, image etc... copy url and open in new browser tab, check the image rendered....

16) Create a custom preset EAEM, for 450 x 450 sizing and 100% quality....

17) Image delivery using custom preset EAEM


No comments:
Post a Comment